Impersonation
Impersonation was designed as a support tool for secretaries to look at their Partners' KPIs and see what they see from a security perspective, not to act on behalf of them.
In Umbria, each person is a group. A secretary can be granted access to all of a lawyer's matters simply by being added to the lawyer's personal group, rather than requiring matter security to be adjusted. Secretaries can be assigned the Associate dashboard, where they can create and save user-specific searches.
Security and Permissions
The Impersonation functionality works with two built-in permissions. Before impersonation is configured, it is advised to ensure that these permissions are in the system. By default, impersonation is not configured for any users or groups.
| Permission Group | Role Permissions Code | Description |
|---|---|---|
| Global | UMBRIA_IMPERSONATION |
Gives the user permission to be able to impersonate others (Shows/hides the Impersonation option in the User Menu) |
| User | USER_IMPERSONATE | Users with this permission can be impersonated. |
Note: Apart from the above permissions, the user group impersonating another role must also be granted access to that role in the Admin>Security> Object Confidentiality node via the Edit Security option. For e.g. A pricing team member impersonating a partner role must be granted access to the partner role in the object confidentiality.
Set Up Impersonation
The instructions below are for a System Admin or Power User to set up impersonation.
To configure impersonation for user groups:
- In the Admin Panel, in the Organizational Security Role node, select the desired role and click the Edit button to edit security.
- Find Impersonate Other Users in the User section of the Available Permissions list. Click Add to add it to the Assigned Permissions list, then click Save.
Note: This will not allow the included users to impersonate others until a group that can be impersonated is created.
- In the Implicit Security By Metadata node, select Security from the Select Groups drop-down menu in the toolbar.
-
Select a group that you want to configure then click the Edit Security button. The Group Security pop-up window appears.
- Click the Add button under Allow Rules. An Add Record pop-up window appears.
- From the User/Group drop-down menu, select the group you granted the Impersonate Other Users permission to.
- From the Role drop-down menu, select Impersonator and click Save.
Tip: When group security is changed, it is advised to update related objects and reindex users.
To configure impersonation for a specific user:
- Ensure that the user impersonating another user is in a group that has the global role of Impersonate Other Users (see instructions in prior section).
Tip: As an alternative, a new group can be created with the Impersonate Other User enabled and all users that should impersonate other users are to be added to that group.
- In the Admin Panel, in the Users node, select the user and click the Security button in the toolbar. The Entity Security pop-up window appears.
- Click the Add button under Allow Rules. The Add Record pop-up window appears.
- From the User/Group drop-down menu, select the user doing the impersonation.
- From the Role drop-down menu, select Impersonator and click Save.
Tip: When entity security is changed, it is advised to update related objects and reindex users.
User Interface
Users with the impersonate feature see the Impersonate option in their user menu.
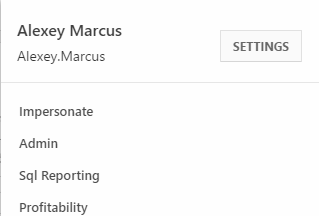
Clicking Impersonate from the user menu opens a pop-up to select the user to impersonate.
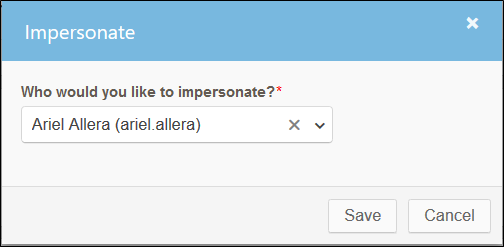
After successfully selecting a user to impersonate, the logged in user shows as:

To stop impersonation, the user clicks on their login and selects Exit Impersonate from the menu that appears.
Note: System logs show that the Impersonator is the one making any changes to the system while impersonating another.