Allocating Expenses (Running Allocation)
Allocations are usually run on a monthly or yearly basis. Before running an allocation, you must run the pre-flight check to verify that all settings were implemented. Some of these settings include:
- Importing General Ledger and Salary data
Note: If you choose to exclude certain accounts from allocation, on the grid in General Ledger>Accounts tab, deselect the check box under the Allocatable column next to the relevant account.
- Mapping salaries to GL accounts
- Mapping fee earner class to GL target
- Setting up Rules and Rule Sets (including default selection)
Allocating Expenses for a Specific Period
To allocate expenses (run allocation) for a specific period:
- Click the Process tab and select Process Engine.
Note: Prior to allocating expenses, click the Pre-Flight Check button to allow the module to verify that necessary setup and configurations are done. A green check mark next to the field indicates that the setting is done and a red X indicates an error/setup was not implemented. Refer to Pre-Flight Check for more information.
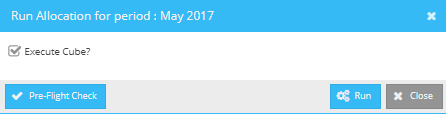
- Select the row of the period for which you are allocating the expenses on the grid, and choose Run Allocation from the Actions drop-down list.
- Click Run to allocate the unallocated expenses entered in the specified time period (both manually imported and synced from the time and billing system).
The allocation engine then groups all transactions by Month, by Account, by Office, and by Department and then processes the transactions in the following order:
- Direct allocation: The allocation engine reads from the GL.Expense table and allocates based on direct expense rules. In some cases, for some people (such as Office Managing Partners), a portion of their salary is treated as overhead. The allocation engine will split the salary into two records: one, as a direct expense to the person and two, to a special account as an overhead. The second record will be further split into multiple rows based on the second-level allocation rule that closely matches, e.g. in some firms, a portion of salary is treated as office-level overhead and a portion of salary is treated as firm-level overhead.
Note: Some firms treat compensation for supporting staff (secretaries and paralegals) as a direct expense to the attorney to which they are reporting.
- Overhead allocation: The allocation engine reads all expense accounts from the GL.Expense table and allocates based on the rules. It first tries to find a rule that would correspond to the account.
- Income allocation: The “Other Income” is allocated as contra expenses. The other income will reduce the overall overhead. (e.g. Lease rent is considered as contra expenses, reducing the overhead expenses).
How does the Allocation Engine Work?
The allocation engine reads all the transactions for a given period from the GL.transactions table. Based on the rule, the engine splits them, creates new allocation records, and inserts them into the profitability.allocation table.
Allocation is done at a two levels. First at the firm, office or department level, and then into timekeepers, at a second level. After the allocation is completed, the engine updates the cube and aggregate tables, such as the allocationsummary.Hourcostmonth table.
Note: If a specific rule is not found, the default rule is used.
To remove allocations applied to expenses incurred during a particular time period:
- Click the Process tab and select Process Engine.
- Select the row of the period for which you have to delete the allocated the expenses on the grid, and choose Delete Allocation from the Actions drop-down list. A Delete Allocation pop-up window displays.
Allocating Individual Expenses Manually
The Expenses sub-tab, within the General Ledger tab, shows a list of all expense transactions recorded in the system (accounts, expenses, and income are imported from GL. You can use the Period filter to change the time period for which you are viewing expenses, or you can enter a portion of the account number or transaction description in the search field and click Search.
To manually allocate an expense:
- Select the expense on the list and in the Action drop down column, click the Manual Allocation button.
- The transaction # and the amount to be allocated is displayed.
- On the Manual Allocation window, determine whether this will be an Equal Split (amount automatically divided equally among all timekeepers you specify) or a Manual Split (an amount will be manually entered for each timekeeper).
- Click the Add button to select a timekeeper from the Working Attorney drop-down. If doing a manual split, enter the allocated amount in the Amount column.
- Repeat until you have entered all appropriate timekeepers. To perform a more granular search for a timekeeper, you can click the Advanced Search button, which launches a search pop-up that allows you to filter by office, department, or fee earner category.
- Click Save to apply the allocation.
Viewing Allocation Data
The Allocation sub-tab, within the General Ledger tab, displays all allocated transactions, at the allocation level. Each row in the list represents the allocated portion of a transaction; therefore, multiple rows might have the same value in the Trans# column.