About Matters
Drilling down into a matter from a dashboard or a matter search page takes you to the matter detail interface, which replaces the main navigation menu with a Matter menu that lists the following links.
| Page |
|---|
| Budget |
| Planning |
| Rate Card |
| Arrangements |
| Comments |
| Contacts |
| Profile |
| Risk Management |
| Monitor |
| Revenue |
| Time Entries |
| Expenses |
| Players and Parties |
| Tasks |
Note: The matter detail page displayed from a drill-down link depends on the context (e.g., a matter link on the Partner Performance page opens the matter's Performance page).
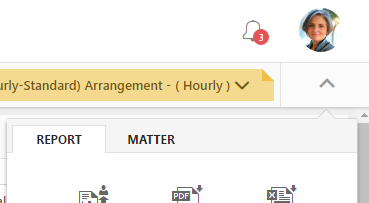
To access the actions available for this report, click the drop-down arrow in the upper right corner of the screen. The Reports tab of the action menu displays by default.
Reports
To export the data to a template, click the drop-down arrow in the upper-right of the screen to open the action menu. Click Export.
- In the Export dialog select the purpose of the export if the report is to be shared with Client or for Internal use.
- Select the template from the drop-down. To make a template available for client selection, when adding an export template in Admin, check the box for Client. The other templates options can also be set when adding a template.
- Select the Basis of Accounting from the drop-down. You can determine whether to default to Accrual Basis or Cash Basis logic when pulling in data based on a specified timeframe. (Only available for Excel reports)
- Accrual basis pulls in information based on what was billed during the specified timeframe.
- Accrual Basis by Posted Date: Accrual basis by posted date pulls in information based on what was billed during the specified Posted date.
- Cash basis filters all activity (time entry, billing, and collection) independently based on the specified timeframe.
- Cash Basis by Posted Date: Cash basis by posted date filters all activity (time entry, billing, and collection) independently based on the specified Posted date.
- The default selection for period would be based on the Period filter applied on the Matter Monitor page. You can change the selection to All Time.
To export the internal report:
Click the Screenshot to PDF button on the Report tab, depending on your preferred output. A screen shot of the current view downloads to your computer's default location.
To adjust phase dates:
- Click the Adjust Phase Dates button on the Report tab. An Adjust Phase Dates pop-up window displays.
- Modify the Matter Start Date and End Date as necessary, as well as the Start Date and End Date of any individual phases. To mark a phase as completed, select the Closed checkbox. The Closed Date defaults to today's date.
- Click Save.
To report percentage complete:
This option is available only if the matter has a budget.
- Click the Report % Complete button on the Report tab. The Adjust Phase Completion Percentage pop-up appears.
- Click the pencil icon to the right of a phase to modify it. (You can also add a new phase and report its percentage of completion by clicking the Add button.)
- Make any necessary changes to the % of Completion or Completion Date fields and click Save.
Tip: In the % of Completion field, enter only whole numbers. Numbers with decimals are rounded to the closest whole number.
This ensures that the data you are viewing is completely up to date, as the screen does not automatically refresh.
To recalculate report data:
- On the Report tab, click the Recalculate button. You see a confirmation prompt that warns you recalculation may take a few minutes.
- Click OK to proceed.
To exclude time entries from the budget:
- Click the Exclude Time button on the Report tab. A list of time entries displays. You can narrow the list by Person, search on a portion of the time entry Description, or change the time Period for which you are viewing time entries.
- Select the circle to the left of each time entry you wish to exclude and click the Exclude button in the upper right corner of the screen. A confirmation prompt warns you that this will prevent the entry from being reflected in performance reports. Click OK.
Note: To change an excluded time entry back to included, you can filter this list by selecting the Only display excluded checkbox. You can then select the excluded time entry and click the Include button.
Note: In the TimeMonth table, time is marked as excluded for the time entries excluded manually (from the UI) or if the time entry date is before the budget start date, however in the TimeEntry table only the time entries excluded manually(from the UI) are marked as excluded.
To exclude expenses from the budget:
- Click the Exclude Expense button on the Report tab. A list of vendor invoices displays. You can search on a portion of the Invoice No. or invoice Description, or change the time Period for which you are viewing invoices.
- Select the circle to the left of each invoice you wish to exclude and click the Exclude button in the upper right corner of the screen. A confirmation prompt warns you that this will prevent the invoice from being reflected in performance reports. Click OK.
Note: To change an excluded invoice back to included, you can filter this list by selecting the Only display excluded checkbox. You can then select the excluded invoice and click the Include button.
To assign/reassign phase and task codes for time entries:
- Click the Code Reassignment button on the Report tab. A list of time entries displays. You can narrow the list by Person, search on a portion of the time entry Description, or change the time Period for which you are viewing time entries. You can also narrow the list to time entries associated to a particular Phase or Task, or select the Only display unassigned checkbox.
Note: If you search by Phase, the Phase Code is not displayed in parentheses in the Task Code look up. If the Phase Code is not selected, the Task Code look up will display the Phase Code in parentheses, only if the task code has a phase code associated to it.
- Select a time entry. To filter the list to show only time entries with descriptions similar to this one, you can click the Find Similar Entries button. Click the X to the right of the list filter to remove it.
- Select a time entry to enable the following options. When you have selected all the time entries you wish to update, click one of the following:
- Find Similar Entries: Click this button to find similar time entries on the page.
- Assign Activity Code: Update the activity code for the time-entry and click Save.
- Phase/Task Code: Click the drop-down next to this button and select either Assign or Unassign. If you select Assign,
- From the Please select template drop-down, select the template you wish to assign to the matter. (This drop-down is only available for non-budgeted matters with time entries)
- From the Phase and Taskdrop-down select the phase and the task code to be associated to the matter.
- Click Save to apply your changes.
Note: The Task Codes must be manually added to a Phase to make it available for selection in the Task drop-down. Read more here Assigning Task Codes to Phases.
Click Yes or No to assign time entries by budget start date in absence of phase or task code for mapping. Click Save to apply your changes.
Note: Set the option to 'Yes' if the phase codes are set in the Time Entry.
Matter
Email notifications must be set up on each individual matter you wish to receive notifications.
- On the Matter tab, click the Email Settings button. The Email Settings window appears.
- Select one of the email notifications on the left side of the window. The table below lists the types of email notifications available out-of-the-box with a definition of each.
- After selecting a notification type on the left side of the window, you can do the following:
-
Toggle the On button to enable the email notification.
-
For the Budget Threshold Warning and Target Realization Warning notifications only, you will need to set at least one trigger to determine when the notification is sent. To set up a trigger, click the Add button in the trigger panel.
-
In the option for Select value to monitor select the radio button for any one of the option, to have the warning trigger based on one these values. The alert will be sent when the value is triggered and email will include information for the selected value.
-
In the option for Select the target to monitor you can configure the monitor target type. set option to monitor against Budget Amount (Estimated Effort Including Additional Discount), Net Budget, or Budget Amount (Estimated Effort), By default it is set to the first option.
Target Description Budget Amount (Estimated Effort Including Additional Discount) Amount derived by multiplying time keeper hours with the matter rate, taking into account bill discounts and premiums. Net Budget In case of Fee Cap:
- If the Arrangement Amount is more than the Budget amount (after bottom up bill discounts) then the Budget amount (after bill discounts) will be considered as the Net Budget amount i.e. Net Budget = Budget Amount (after discount) .
- If the Arrangement Amount is less than the Budget amount then the Arrangement amount will be considered as the Net Budget amount i.e. Net Budget = Arrangement Amount.
In case of Fixed Fee:
- The Arrangement amount will be always be considered as the Net Budget amount i.e. Net Budget = Arrangement Amount.
-
If there is no arrangement associated, then the Budget amount (after bill discount) will be considered as the Net Budget i.e. Net Budget = Budget Amount (after discount).
-
If there are no discounts the Budget amount will be considered as Net Budget i.e. Net Budget = Budget Amount.
Budget Amount (Estimated Effort) Amount arrived at based on hours estimated for each time keeper. -
For Budget Threshold Warning, from the Scope drop-down select the level at which you are tracking the budget threshold (Matter, Phase Code, or Task Code). If you select Phase Code or Task Code, select the desired phase/task code from the drop-down. For Target Realization Warning, from the Scope drop-down select the values at which you are tracking the target realization (Billable Values or Entered Values).
-
For each warning level (Warning, Danger, and Critical), enter the number of hours or the percentage of the total budget that needs to be reached (or the percentage of target realization) in order for the notification to be sent. Click Save. If it should be sent each day until manually turned off, select the Warn until turned off checkbox.
Note: In case of Budget Threshold Warning the email alerts will be sent out if the values exceed the number of hours or the percentage of the total budget entered here. In case of Target Realization Warning the email alerts will be sent out if the values drop below the percentage of target realization entered here.
-
For the No Billing Activity notification only, enter the number of days of inactivity that should trigger the email being sent.
-
For monthly notifications enter the day of the month on which the email should be sent.
-
For weekly notifications select each day on which the email should be sent.
-
Enter the time at which the email should be sent. Click the Add button to enter recipients. Recipients can be directly emailed, CCed, or BCCed. Select the appropriate person from the Who should appear as the sender of the email? drop-down.
- Click the Save button when finished.
- Click the Test button in the upper right corner of the Email Settings window to send a sample email message. Enter the recipient's email address in the field provided and click Send Test Email. The data contained in the test email is fictitious and not specific to the matter you have open.
Note: The recipient of the email can see the sender name selected here based on Global Settings>SMTP Settings
Note:If more than one trigger is set for the Budget Threshold Warning/Target Realization Warning, a single email alert will be sent out with the approriate information in separate sections based on the set triggers. Some sample email notifications are provided in the Alerts page.
Tip: You can disable the Email Settings option for various users. Admin: Permission Group: Matter> View Email Settings Option
You can quickly subscribe/unsubscribe to email notifications on a matter by doing the following:
- On the Matter tab, then click Email Subscriptions.
- For each email notification listed on the Email Subscriptions pop-up window, click the space next to Unsubscribed to change the setting to Subscribed, or vice versa.
Tip: You can disable the Email Subscription option for various users. Admin: Permission Group: Matter> Email Notification Settings
Tip: You can disable the Upload Ebill option for various users. Admin: Permission Group: Matter>Upload E-bill.
A task code set is a custom set of task codes that may be firm- or client-specific variations on the standard UTBMS task codes. A task code template includes task code information but also takes the configuration a step further and defines phases.
Click the Set Template/TaskCodeSet button on the Matter tab. On the Set Template / Task Code Set pop-up window, select a Template or a Task Code Set and click Save.
Tip: You can disable the Set Template/Task Code Set option for various users. Admin: Permission Group: Matter>Edit Matter Experience.
Click the Matter Properties button on the Matter tab. You can update the matter and matter family details here. Click the Edit button on the top right corner of the window to edit details. Fields marked with * are mandatory. Click the Save button on the each of the tab you edit to save details. The following options are available for this screen:
Tip: You can disable the Matter Properties option for various users. Admin: Permission Group>Matter>Edit Matter Properties. To disable the Edit option in the Matter Properties window. Admin: Permission Group>Matter>View Matter Properties.
| Tabs | Available Options |
|---|---|
| Details |
Other Settings:
Note: This setting will not be available for Profile Only kind of matters.
|
| Sub-Matters | Click the Add Matters button to add sub-matters. This tab will only be displayed if the Kind of Matter selected is Single. This tab will list all sub matters associated with the matter. Tip: You can disable the Add Matters button on the Sub-Matters tab for various users. Admin: Permission Group>Matter>Add Matter Sub-Matters. You can hide the Delete option for various users. Admin: Permission Group>Matter>Remove Matter Sub-Matters |
| Related Matters |
This tab will list all the related matters, that will include the Matter Children, Matter Family and other related matters. |
| Ownership |
The Ownership tab will display the users in the Commission and Billing role. The roles in the Commission and Billing section is determined as per the Internal Matter Role set in Admin. Click on the pencil icon to edit the person details. Click on the X to remove a person from the Commission or Billing role. Click on the Add button to add more users to the Commission or Billing role. Tip: You can manage the view and edit options on the Ownership tab. These permissions are available in Admin>Permission Group>Matter. |
| Security |
The Matter team member names are displayed here. To add team members, click the Add button. In the Role column click on the person role to view the permissions assigned to each member. To edit a member (e.g., select a different person or class), click the pencil icon. To remove a member, click the X in the far right column. |
| Core Profile |
Enter information for the following details:
|
| Parties | This tab will display the Players and Parties set for the matter. You can also set it here. Select the Clients, Adverse Party, and Co-Party for the matter. Click the Save button. |
| Matter Family Members |
This tab will only be displayed if the Kind of Matter selected is Grouping. This tab will list all the matter family members. Click on the X to remove a matter. Import Matters: Click the Import Matters button to bulk import and add matters to the matter family. In the Import Family Members window, browse and select the file containing matter family details. You may click on the Download Sample Excel button to download a sample format. Click on the Import button to import the matter family members.
Add Matters: Click the Add Matters button to manually browse and add matter family members. In the Add Matter Family Members window check the box next to the listed matter names. The matter names will be displayed in the Selected Matters panel on the right. To search and add a matter, enter the matter name, number, or client in the search bar on the left panel. To remove a matter, click the X in the far right column. Click the Add Matters button to add the selected matters to the matter family. Tip: You can enable /disable the add and delete option on the tab. These permissions are available in Admin>Permission Group>Matter. |
This option is only available in the Matter Planning action menu. Click this option to set target realization for a matter. In the Set Targets dialog, select the level to plan the write off and enter the write down percentage. You can write off at matter level or By Phases or By Resources. Enter the estimated Leverage , PPP Target amount, Profit Margin Target % and the Realization Target %. Click Save.
Note: The target set will be taken into account to send target realization warning email notifications i.e. compare the realization with the specified targets here. The Financial Matter Search page Billed vs Target Realization only considers the imported target realization set for a matter and not the target specified here.
Select this option to merge an opportunity to an existing matter.
- Click the Merge to Matter button on the Opportunity tab. The Merge to Matter window displays.
- Select a matter from the drop-down menu.
- Check the box to select the experience data to be copied to the matter.
- Click Save.
Tip: You can disable the Merge to Matter option for various users. Admin: Permission Group: Matter>Can Merge Opportunity to Matter.
Note: You can set the default option of the fields to be copied to the matter, so you do not have to check/uncheck each time when merging the opportunity to a matter. This option can be set in Global Settings>Opportunity Merge Settings tab. Opportunites without a pricing model can also be merged to a matter if the Restrict merge to the opportunities that has pricing model is not selected. However the permission enabled/disabled to the user will override the Global Settings>Merge Options.